Creating a fourth order active filter circuit using TINACloud

Creating a fourth order active filter circuit using TINACloud

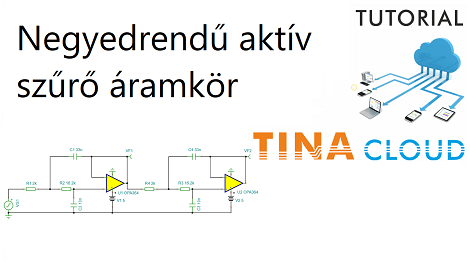
Watch our updated tutorial video about how to create and analyze a fourth order active filter circuit using TINACloud.

Fourth order low pass filters are normally composed of two cascaded second order blocks.

In this video we present how to create the first block step by step, then we create the second one by using Multiple Selection, Copy and Paste.

Next, we test the circuit by running AC Transfer Analysis, finally we add the AC Bode diagram to the circuit.

We also demonstrate how to change the default value of the components, or how to use the Zoom command, add labels, title to the circuit and pan it on the screen.

Click here to watch our tutorial video and learn more.

You can learn more about TINA here: www.tina.com

You can learn more about TINACloud here: www.tinacloud.com

What is TINACloud?

What is TINACloud?

Today we have uploaded to our youtube channel an updated version of our Information video and tutorial of TINACloud 2.

In this tutorial video we will show you how to create and analyze a fourth order active filter circuit using the Spice model of the OPA364 operational amplifier.

Click here to watch our tutorial video and learn more.

You can learn more about TINA here: www.tina.com

You can learn more about TINACloud here: www.tinacloud.com

Creating Problem Sets with TTask

Creating Problem Sets with TTask

In this tutorial video, we create a problem set from the already prepared problems (circuits) to control the Training and Educational mode of TINA and TINACloud. The control file for TINA has an extension of .EXA while the extension for TINACloud is .EXAR.

Note that in the Training and Examination mode of TINA, in addition to the .EXA files, you also need the problem circuit files saved in the “Test files” or another folder, while in the case of TINACloud, the .EXAR files contain everything.

You can generate these files with the TTask utility of the offline Educational version of TINA. 

Click here to watch our tutorial video and learn more.

You can learn more about TINA here: www.tina.com

You can learn more about TINACloud here: www.tinacloud.com

Creating Problem Circuits for Training and Examination

Creating Problem Circuits for Training and Examination

In this tutorial we demonstrate how to create problem circuits using TINA’s Exam Manager.

First, we create a selection type of problem set with four alternatives including one correct and three incorrect answers .

The next task we add to our problem set: a voltage division problem. In this circuit, students have to calculate the voltage V shown by the voltmeter on resistor R2. In this kind of problem, there is no need to set anything in the Exam Manager, as the solution is automatically calculated.

However, you may want to add some advice (hints) here for the students using the Advisor Tab. You can decide whether the students get a penalty—that is, a reduction of the maximum possible score as a percentage (%).

The third task we create is a multiple-choice–type test with three hints.

Finally, we create a troubleshooting (or, in other words, fault finding) problem where the students have to find the faulty part in a circuit. We assume that only one part is faulty.

We insert a fault into the circuit. We do this by associating so-called shadow circuits with it, which contain faults. You can assign as many as 15 shadow circuits to each good original circuit. The program selects a shadow circuit randomly when loading a troubleshooting problem.

You can find these circuits in TINA’s TEST folder.

In the next “How to create problems sets using TTask” video tutorial, we will show how to create a problem set from these circuits using TINA’s TTask (Task List Editor) utility.

Watch our tutorial video to learn more.

You can learn more about TINA here: www.tina.com

You can learn more about TINACloud here: www.tinacloud.com

How to run an examination session and evaluate students’ results in TINACloud’s Supervisor mode

How to run an examination session and evaluate students’ results in TINACloud’s Supervisor mode

Click here to watch our tutorial video and learn more.

In this tutorial we demonstrate the examination session process and show how teachers can follow students’ activity and then evaluate their results with TINACloud’s Supervisor program.

We assume that two students, student13 and student21, added in the “How to create classes, class members and problem sets tutorial are participating in the examination simultaneously.

In examination mode, the program does not indicate if the result is good or bad. It displays only an Answer submitted message, and the next problem is automatically loaded.

You can  check the status any time with Supervisor, even after the examination has ended, unless you delete the results using the red x at the end of the problem set line.

You can also print or save as PDF or as Microsoft XPS Document Writer these test results using the Print function.

Click here to watch our tutorial video and learn more.

You can learn more about TINA here: www.tina.com

You can learn more about TINACloud here: www.tinacloud.com