Creating and analyzing circuits on tablets with TINACloud in Hebrew language

Creating and analyzing circuits on tablets with TINACloud in Hebrew language

  TINACloud יצירה וניתוח של מעגלים בטאבלטים עם

.TINACloud עם iPad – בסרטון הדרכה זה נדגים כיצד ליצור ולנתח מעגל ב

 .התהליך דומה מאוד בטאבלטים מבוססי אנדרואיד

In this video we create a circuit and then describe how to edit with your finger but editing with a stylus is very similar.

On the iPad you can use pinch to zoom in and out, like you pinch to zoom your photos on your phone or tablet.

After the circuit is complete we will test it by AC Analysis. We set the frequency range, and then tap the Run button. Several diagrams will be generated including Amplitude, Phase, Nyquist, Group Delay and Bode Diagrams.

Click  here  to watch our tutorial video with Hebrew voice-over and subtitles and learn more.

You can learn more about TINA here: www.tina.com

You can learn more about TINACloud here: www.tinacloud.com

Creation and Simulation of an OPA569 Laser Driver Circuit using TINACloud (Updated version, with integrated Circuit Editor)

Creation and Simulation of an OPA569 Laser Driver Circuit using TINACloud (Updated version, with integrated Circuit Editor)

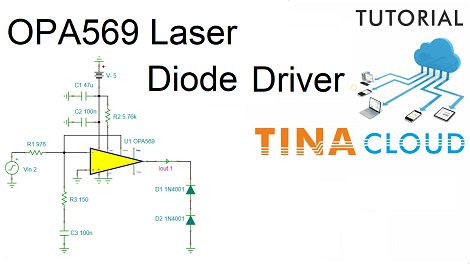
In this tutorial we will demonstrate how to create a Laser Driver circuit with a negative voltage supply using the Spice model of the OPA569 operation amplifier.

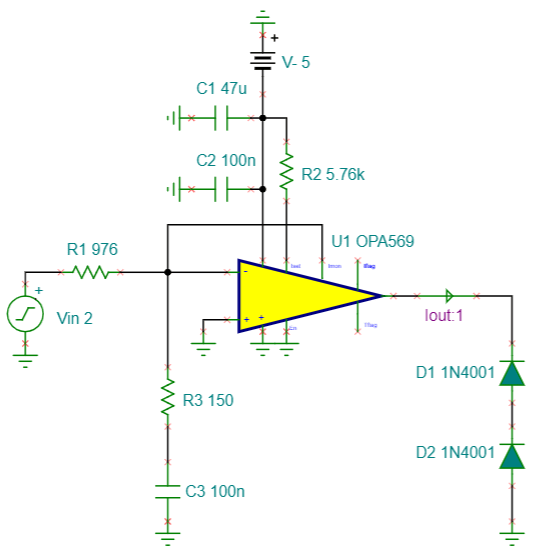
First, we will create the circuit like the one on this sample schematic:

OPA569 Laser Diode Driver

As it can be seen, we will use 3 Resistors, 3 Capacitors, 2 Diodes, a Voltage Generator, a Battery, a Current Arrow and of course some Grounds.

Some of the components need to be rotated. We will show how to rotate components before or after they are placed on the schematic editor window.

Next, we will present how to set the default component values.

After the circuit is complete we will test the circuit by running Transient, AC analysis and finally DC analysis.

We will also add one of the diagrams and a title to the circuit.

To learn more watch our tutorial video.

You can learn more about TINA here: www.tina.com

You can learn more about TINACloud here: www.tinacloud.com
Using TINA for analysis of pitfalls related with the Feedback Capacitor in Low-pass Filters (Updated version)

Using TINA for analysis of pitfalls related with the Feedback Capacitor in Low-pass Filters (Updated version)

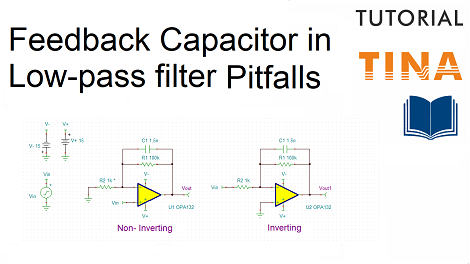
Adding a capacitor in parallel with the feedback resistor of an op amp is an easy way of accomplishing low-pass filtering.

This technique works quite well in an inverting amplifier but not necessarily in a non-inverting amplifier.

In this video we will demonstrate the above by creating and then analyzing an inverting and non-inverting circuits using the Spice model of the OPA132 Operational Amplifier in TINA.

We will illustrate in details how to select, rotate, move or position the components or copy and paste the circuit or part of the circuit using TINA’s Schematic Editor.

Creating the non-inverting and the inverting circuits

First, we will create the non-inverting circuit, then we will copy the circuit and then modify where needed to create the inverting circuit.

To test the circuits we will run AC Transfer Characteristic from the Analysis menu.

Testing the Non-inverting circuit

To test the non-inverting circuit click the output voltage pin of the Non-Inverting circuit and Set the Display signal to „Yes” mode, or check if it is already set so. Also change the signal of the output voltage pin of the Inverting circuit to No.

Next, run AC Analysis. As we can see for the lowest curve with a gain of 6db the stopband attenuation is 6dB only.

Analyzing the Inverting circuit

To test the inverting circuit click the output voltage pin of the Inverting circuit and Set the Display signal to „Yes” mode. Also change back the signal of the output voltage pin of the Non-Inverting circuit to No.

After running AC Analysis we can see that all curves exhibit normal 20dB/decade stopband attenuation.

We will also show how to add labels to the curve in the diagram and edit text properties.

Finally we will add this diagram to the circuit to save them together.

To learn more watch our tutorial video.

You can learn more about TINA here: www.tina.com

You can learn more about TINACloud here: www.tinacloud.com
Using TINACloud for analysis of pitfalls related with the Feedback Capacitor in Low-pass Filters (Updated version, with integrated Circuit Editor)

Using TINACloud for analysis of pitfalls related with the Feedback Capacitor in Low-pass Filters (Updated version, with integrated Circuit Editor)

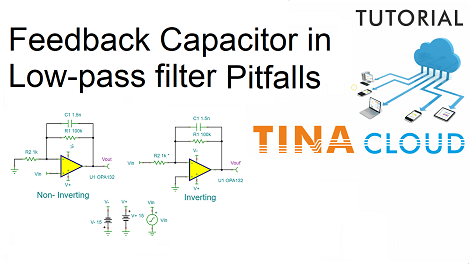
Adding a capacitor in parallel with the feedback resistor of an op amp is an easy way of accomplishing low-pass filtering.

This technique works quite well in an inverting amplifier but not necessarily in a non-inverting amplifier.

If the non-inverting amplifier has high gain, the filtering is not bad, but inferior to the inverting case.                                                    

We will illustrate the above by creating and analyzing both circuits. We will use the Spice model of the OPA132 Operational Amplifier.

1. Creating the non-inverting circuit

First we will create the non-inverting circuit. As the components are inserted using their default values, next we will show how to enter the required component values.

2. Creating the inverting circuit

As the two circuits are similar,we will edit and copy the Non-Inverting circuit and then modify where needed.

3. Testing the circuits

In order to step R2, set Parallel Stepping in the Mode Dialog under the Analysis menu. This will step both R2 resistors parallelly.

Select Mode from the Analysis Menu, then in the Analysis Mode dialog select Parameter Stepping from the list.

Next, select Parallel stepping from the Stepping Mode list.

We will test first the Non-Inverting circuit.

Click the output voltage pin of the Non-Inverting circuit and Set the Display signal to „Yes” mode, or check if it is already set so.

Next click at the output voltage pin of the Inverting circuit and set the Display signal to No.

From the Analysis menu select AC Analysis, then AC Transfer Characteristic.

For the lowest curve with a gain of 6db the stopband attenuation is 6dB only.

Now test the Inverting circuit.

To learn more watch our tutorial video.

You can learn more about TINA here: www.tina.com

You can learn more about TINACloud here: www.tinacloud.com
Adding analysis control links to your circuit in TINACloud (Updated version, with integrated Circuit Editor)

Adding analysis control links to your circuit in TINACloud (Updated version, with integrated Circuit Editor)

Adding analysis control links to your circuit

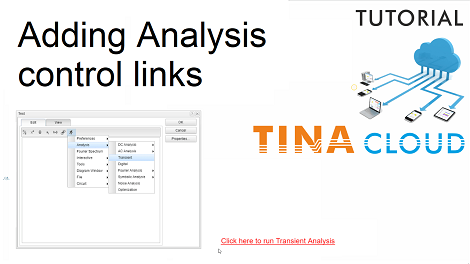
In this video (Adding analysis links to TINACloud) we will demonstrate how to add links to your circuits which allow you to carry out most TINACloud analyses simply by clicking the links without using TINAclouds’s menus.

First log-in to TINACloud, then open a circuit by using the File/Open menu. Next, click the T (Insert Text…) icon.

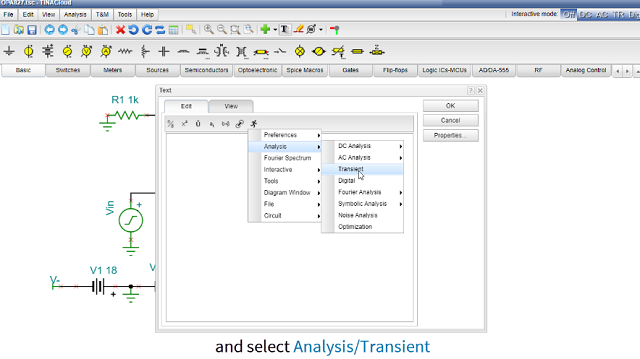
In the dialog box click the “Running man shaped” Action button and select Analysis/Transient.


Adding analysis control links to TINACloud: Select Analysis/Transient

Now, you can insert the appropriate text, in our case: “Click here to run Transient Analysis”, finally click OK to close the Dialog box. The link will be attached to your cursor and you can place it anywhere on the workplace.

Example:

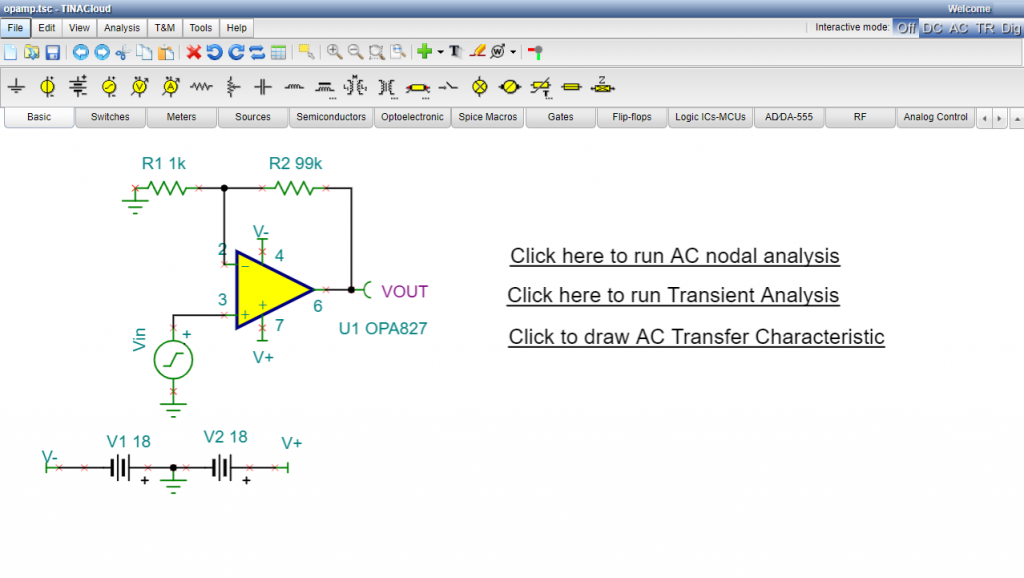
Analyze the following Opamp827 circuit using  the TINACloud online circuit simulator software  by clicking the link or the image below:

a) Click the following link to analyse the circuit:

Opamp827 circuit

b) Embedded OPAMP simulation: Click the links on the picture to proceed with various analyses.
Opa827

If you click the “Click here to run AC transient analysis” link, the Transient analysis will automatically run and You can now run cursor on the diagram or close the diagram and make further analyses.

Watch our tutorial video to learn more.

You can learn more about TINA here: www.tina.com

You can learn more about TINACloud here: www.tinacloud.com